5.2. Modbus - Adding a Device to EdgeX
EdgeX - Barcelona Release
Ubuntu Desktop 16.04 with Docker/Docker-Compose
Adding a new Modbus RTU Device
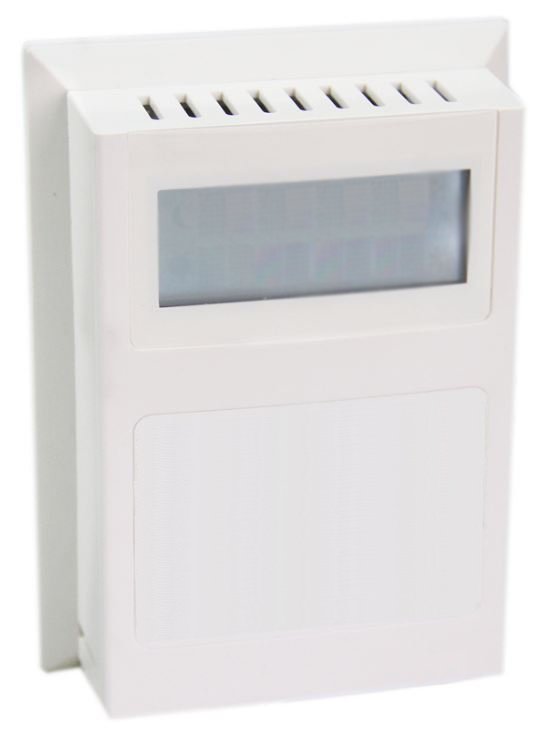
Datanab Modbus Enabled Room Temperature & Humidity Sensor w/ LCD
5.2.1. Project Components Needed
Hardware needed
X86 computer with native RS485 communication device or RS485 adapter
Datanab Modbus Enabled Room Temp/Humidity Sensor w/ LCD
– http://www.datanab.com/sensors/modbus_rth_lcd.php
Software needed
Ubuntu Desktop 16.04 - new installation
The following software was installed via the “apt-get install” command (ubuntu default)
- git
- curl
- vim (or your favorite editor)
- java (I used openjdk-8-jdk - 1.8.0_131)
- maven
- docker
- docker-compose
The following software was installed from 3rd parties
Postman (Linux 64bit)
EdgeX - barcelona-docker-compose.yaml
– https://github.com/edgexfoundry/developer-scripts/blob/master/docker-compose.yml
Modbus - Device documentation
– http://www.datanab.com/zc/docs/sensors/MBus_RTH_LCD.pdf
Modbus - Device communication settings
Modbus device Baud rate = 19200
Modbus device Parity = N (none)
Modbus device Data bits = 8
Modbus device Stop bits = 1 Modbus device address: 254 (device specific) Modbus device register: 100, 101, 102 (device specific) Modbus device register data type: Integer/Floating point (device specific)
Gateway RS485 Port Configuration
For the Dell Edge Gateway 5000:
- Port = “COM 3 (/dev/ttyS5)”
- Port pin 1 = DATA +
- Port pin 2 = DATA -
- Port pin 3 = GND
Ensuring success
Verify the following, prior to following the instruction on the following pages
Is the COM port set to RS485?
Does the Modbus device power on?
With a separate utility, can you read(from)/write(to) the modbus device?
Creating the Modbus yaml file
An example Modbus device yaml file can be found here: Modbus device yaml.
The Modbus device yaml file used in this example can be found here: this example Modbus device yaml.
When you are creating your yaml file you will need to know what command options are available to use, they can be found here:
With your favorite file editor, open the file
Modify the following fields
- name <– A/a ~Z/z and 0 ~ 9 && this will be needed in the future
- manufacturer <– A/a ~Z/z and 0 ~ 9
- model <– A/a ~Z/z and 0 ~ 9
- description <– A/a ~Z/z and 0 ~ 9
- labels <– A/a ~Z/z and 0 ~ 9
deviceResources
- name: <– A/a ~Z/z and 0 ~ 9
- description: <– A/a ~Z/z and 0 ~ 9
- attributes: only edit the text inside the parenthesis
- value: only edit the text inside the parenthesis
- units: only edit the text inside the parenthesis
resources
- name: <– A/a ~Z/z and 0 ~ 9
- get : only edit the text inside the parenthesis
- set: only edit the text inside the parenthesis
commands
- name: <– A/a ~Z/z and 0 ~ 9
- path: “/api/v1/device/{deviceId}/OnlyEditThisWord” <– A/a ~Z/z and 0 ~ 9
- Code ”200”
- expectedvalues: [make same as OnlyEditThisWord]
- Code ”500”
- Do not edit this section
Bringing up EdgeX via Docker
Starting with following system configuration:
- A fresh installation of Ubuntu Desktop 16.04 with all the available system updates.
- A working directory > /home/tester/Development/edgex
Verify your Docker installation
Verify that Docker is installed and working as expected.
>$ sudo docker run hello-world
Verify that the image is on the system
>$ sudo docker ps -a
Download docker-compose file
- Download the barcelona-docker-compose.yaml file from the EdgeX Wiki
- Go to “https://wiki.edgexfoundry.org/display/FA/Barcelona”
- Scroll to the bottom a look for the “barcelona-docker-compose.yml” file. Once downloaded, rename the file to “docker-compose.yml”
- Once the file is download, move the file into your desired working directory.
- Create a copy of the file and rename the copy “docker-compose.yml”
Verify the version of dockerized EdgeX that you will be running
- With your favorite file editor, open the docker-compose.yml file
- Within the first couple of lines you will see the word “Version”, next to that you will see a number - it should be “2”.
- Version 2 refers to the Barcelona release
Enable Modbus in the Docker Compose file
With your favorite file editor, open the docker-compose file
Find the section “device-modbus” section, which will be commented out with “#” symbols.
Uncomment the entire section
Save your changes and exit out of the editor Starting EdgeX Docker components
Start Edgex by using the following commands
| Docker Command | Description | Suggested Waiti Time After Completing |
|---|---|---|
| docker-compose pull | Pull down, but don’t start, all the EdgeX Foundry microservices | Docker Compose will indicate when all the containers have been pulled successfully |
| docker-compose up -d volume | Start the EdgeX Foundry file volume–must be done before the other services are started | A couple of seconds |
| docker-compose up -d config-seed | Start and populate the configuration/registry microservice which all services must register with and get their configuration from | 60 seconds |
| docker-compose up -d mongo | Start the NoSQL MongoDB container | 10 seconds |
| docker-compose up -d logging | Start the logging microservice - used by all micro services that make log entries | 1 minute |
| docker-compose up -d notifications | Start the notifications and alerts microservice–used by many of the microservices | 30 seconds |
| docker-compose up -d metadata | Start the Core Metadata microservice | 1 minute |
| docker-compose up -d data | Start the Core Data microservice | 1 minute |
| docker-compose up -d command | Start the Core Command microservice | 1 minute |
| docker-compose up -d scheduler | Start the scheduling microservice -used by many of the microservices | 1 minute |
| docker-compose up -d export-client | Start the Export Client registration microservice | 1 minute |
| docker-compose up -d export-distro | Start the Export Distribution microservice | 1 minute |
| docker-compose up -d rulesengine | Start the Rules Engine microservice | 1 minute |
| docker-compose up -d device-virtual | Start the virtual device service | 1 minute |
| docker-compose up -d device-modbus | Start the Modbus device service | 1 minute |
Check the containers status
Run a “docker ps -a” command to confirm that all the containers have been downloaded and started
Show containers
To get a list of all the EdgeX containers, you can use “docker-compose config –services”
Stop Containers
To stop (but not remove) all containers, issue “docker-compose stop”.
To stop an individual container, you can use “docker-compose stop [compose-container-name]”.
Start Containers
To start all the containers (after a stop) issue “docker-compose start” to re-start
To start an individual container, you can use “docker-compose start [compose-container-name]” (after that container has been stopped).
Delete Containers * DANGER *
To stop all the containers running and DELETE them, you can use “docker-compose down”
EdgeX Foundry Container Logs
To view the log of any container, use the command:
“docker-compose logs -f compose-contatainer-name”
(ex. docker-compose logs -f edgex-device-snmp)
At this point the Dockerized version of EdgeX is running.
Adding the Device to EdgeX
Importing APIs
In this section you will be using the program Postman to interact with EdgeX. You will also need to have the file “core-metadata.raml” available to load into the Postman application. The file “core-metadata.raml” can be found here: “edgex/core-metadata…./src/test/resources/raml/core-metadata.raml”
Viewing available APIs
- Open Postman
- Click on the Import button
- Add the file to the import dialog box - the application will take a about 30 seconds to digest the file you added.
- If a list of API commands do not show up on the left hand side of the application then click on the “Collections” tab to the right of the “History” tab.
Create an addressable
- In the “Collections” tab, select the option “POST /addressable action
- Open the body tab
- Modify its contents
- name: mbus-rth-lcd-address
- protocol: OTHER (needs to be in ALL CAPS)
- address: /dev/ttyS5,19200,8,1,0
- (actual path to device, baud rate, data bits, stop bits, parity)
- (parity - none = 0, odd = 1, even = 2)
- port: leave unchanged (since using OTHER, it is ignored)
- path: 254 (this is where you enter the Modbus Slave ID)
- publisher, user, password, topic - do not need to be modified
- Press the “Send” button when you are finished
- Note the addressable id
Upload the profile
- In the “Collections” tab select the option “POST /deviceprofile/uploadfile
- Open the body tab
- Under “Key”, look for the drop down menu for “text”. Be sure to write “file” in the open box.
- Under “Value” click “Choose Files”, locate your profile file.
- Press Upload
- Press the “Send” button when you are finished
- Note the profile id
Post the device
- In the “Collections” tab select the option “POST /device
- Click on the “Body” tab
- Modify its contents
- There are three components that are required to be modified. They are:
- “Service”
- “Profile”
- “Addressable”
- The others can be modified, however they are not required for operation
- name: mbus-rth-lcd-device
- description: modbus-thermostat
- addressable:
- name: mbus-rth-lcd-address (same as used in addressable)
- labels: “temperature”, “modbus”,”industrial” (same as used in modbus device profile)
- service:
- name: edgex-device-modbus
- profile:
- name: mbus-rth-lcd (same as used in modbus device profile)
- There are three components that are required to be modified. They are:
- Press the “Send” button when you are finished
- Note the addressable id
What if a Mistake is Made
- Get device id
- Delete device id
- Get device profile id
- Delete device profile id
- Get addressable id
- Delete addressable id
Verify Device Added
Check the edgex-device-modbus logs to see if the device was added without issue
“sudo docker logs -f –tail 100 edgex-device-modbus”
Creating a Scheduled Event
This is used to regularly get & push data to another service or for regularly viewing data. Gathering information for the addressable
Got to http://localhost:48082/api/v1/device
Look for the id or the device that you want to schedule an event for
[

   {

       "name": "mbus-rth-lcd-device",

       "id": "5a1dd585e4b0c3936013123d",  <--- This

       "description": "living room HVAC thermostat",

       "labels": [

           "temperature",

           "modbus",

           "industrial"

       ],

       "adminState": "unlocked",
In this example the id is “5a1dd585e4b0c3936013123d”
Next you want to get the “name” of the command you want to schedule an event for
"commands": [
            {
               "id": "5a1dcdfce4b0c39360131239",
               "name": "TemperatureDegF", <--- This
               "get": {
                   "url": "http://localhost:48082/api/v1/device/5a1dd585e4b0c3936013123d/command/5a1dcdfce4b0c39360131239",
                   "responses": [
                       {
                           "code": "200",
                           "description": "Get the temperature in degrees F",
                           "expectedValues": [
                               "TemperatureDegF"
                           ]
In this example the name is “TemperatureDegF”.
Create addressable
In this section you will need to supply a path the the item you want to schedule.
The path outline is:
/api/v1/device/{device id}/{command name}
In this case, the address would be
/api/v1/device/5a1dd585e4b0c3936013123d/TemperatureDegF

/POST addressable

    “name”: “schedule-mbus-rth-lcd”

    “protocol”: “HTTP”

    “address”: “edgex-device-modbus”

    “port”: “49991”

    “path”: “/api/v1/device/5a1dd585e4b0c3936013123d/TemperatureDegF”

    “method”: “GET”  *** This will need to be added ***
Create a schedule
/POST schedule

    “name”: “interval-mbus-rth-lcd”

    “start”: null (remove parenthesis and replace)

    “end”: null (remove parenthesis and replace)

    “frequency”: “PT5S”
Create an event that will use the schedule
/POST scheduleevent

    “name”: “device-mbus-rth-lcd”

    “addressable”:{“name”:”schedule-mbus-rth-lcd”}

    “schedule”: “interval-mbus-rth-lcd”

    “service”: “edgex-device-modbus” *** This will need to be added ***