6.4. MQTT - Adding a Device to EdgeX
In this example, we use the simulator instead of a real device. This provides a straight-forward way to test the device-mqtt features.
6.4.1. Environment
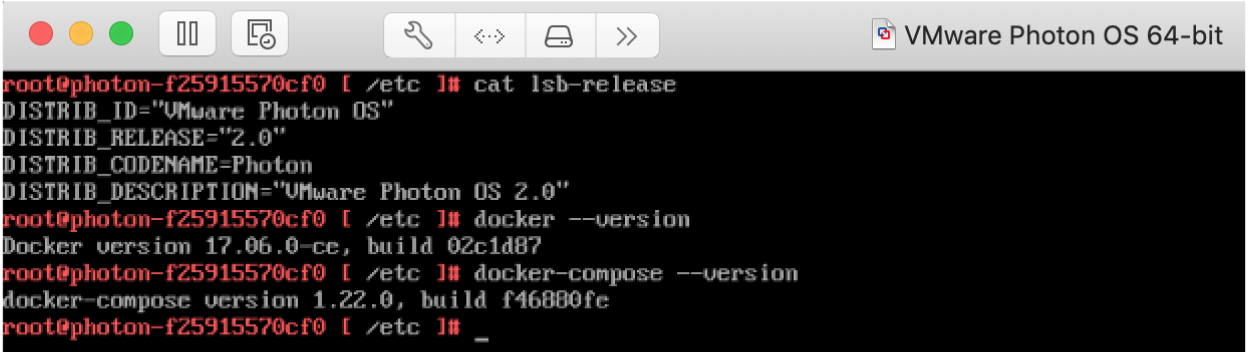
You can use any operating system that can install docker and docker-compose. In this example, we use Photon OS to deploy EdgeX using docker. The system requirements can be found at https://docs.edgexfoundry.org/Ch-GettingStartedUsers.html#what-you-need.
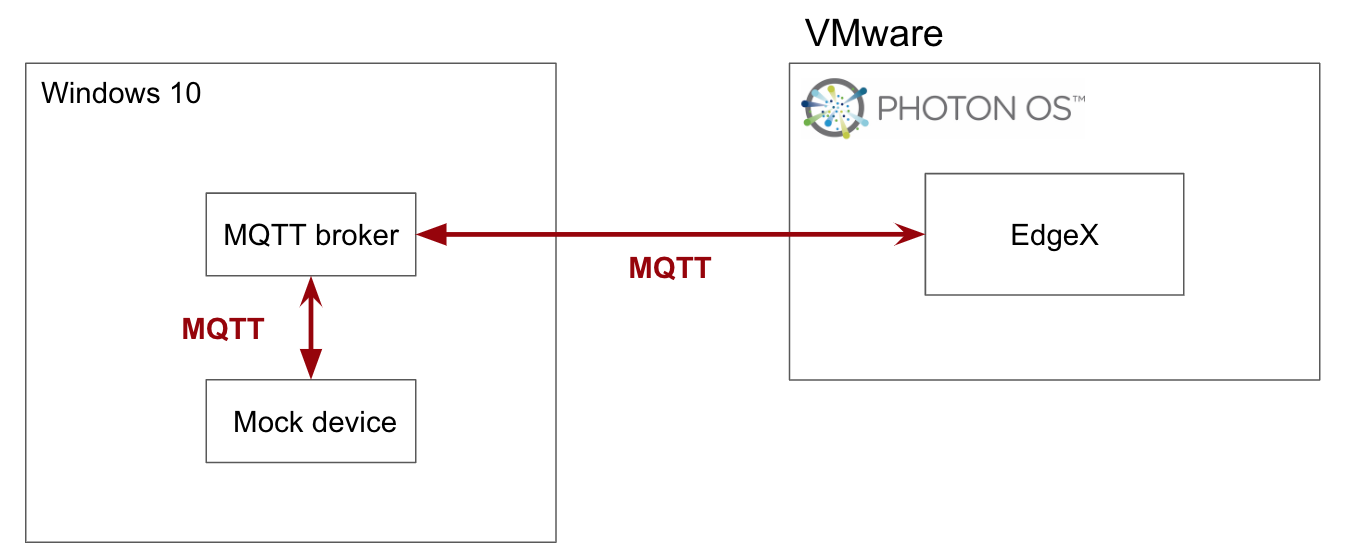
6.4.2. MQTT Broker
EMQ is a MQTT broker that is easy to configure and use. You can download it from http://emqtt.io. It’s fully open source and licensed under Apache Version 2.0.
Run using the following docker command:
docker run -d --rm --name emqx -p 18083:18083 -p 1883:1883 emqx/emqx
After the MQTT broker has started, login to the dashboard using the default account details (name = admin, password = public)

6.4.3. MQTT Device (Simulator)
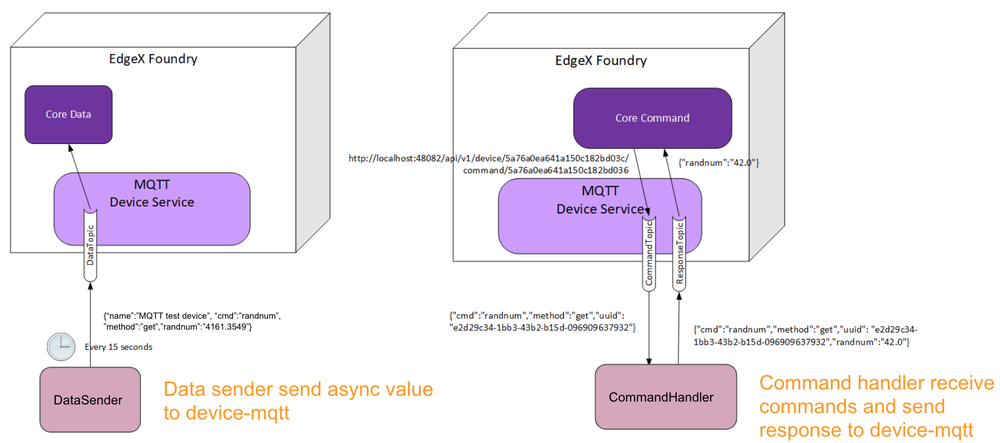
The device-mqtt source code provides a mock device that can send async values and handle commands. You must implement these two functions when using the device-mqtt service as described below.
To set up the service:
Download the source code:
git clone git@github.com:edgexfoundry/device-mqtt-go.git
Modify the broker connection
The broker connection information must be modified to meet our requirement.
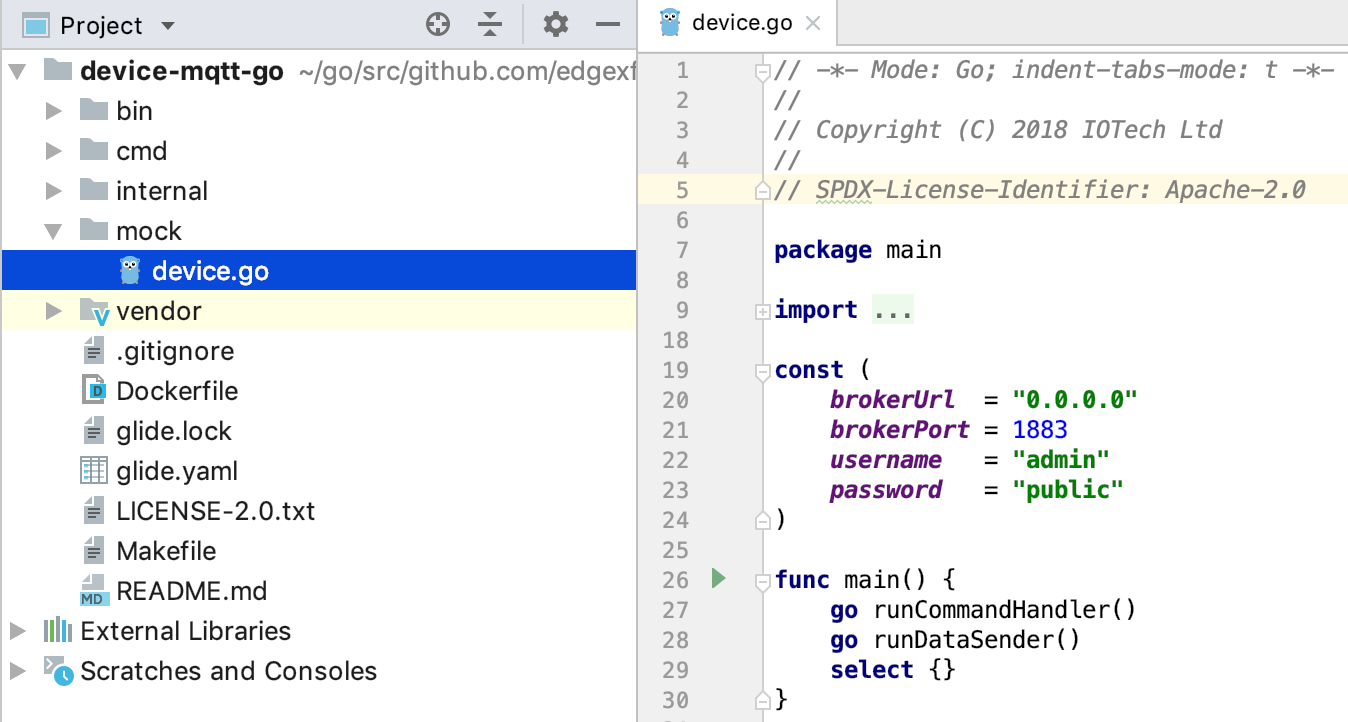
Run the device simulator
Run the following command in your terminal:
go run ./mock/device.go
6.4.4. Set Up
The following sections describe how to complete the set up.
6.4.4.1. Set Up Device Profile
The DeviceProfile defines the device’s values and operation method, which can be Read or Write.
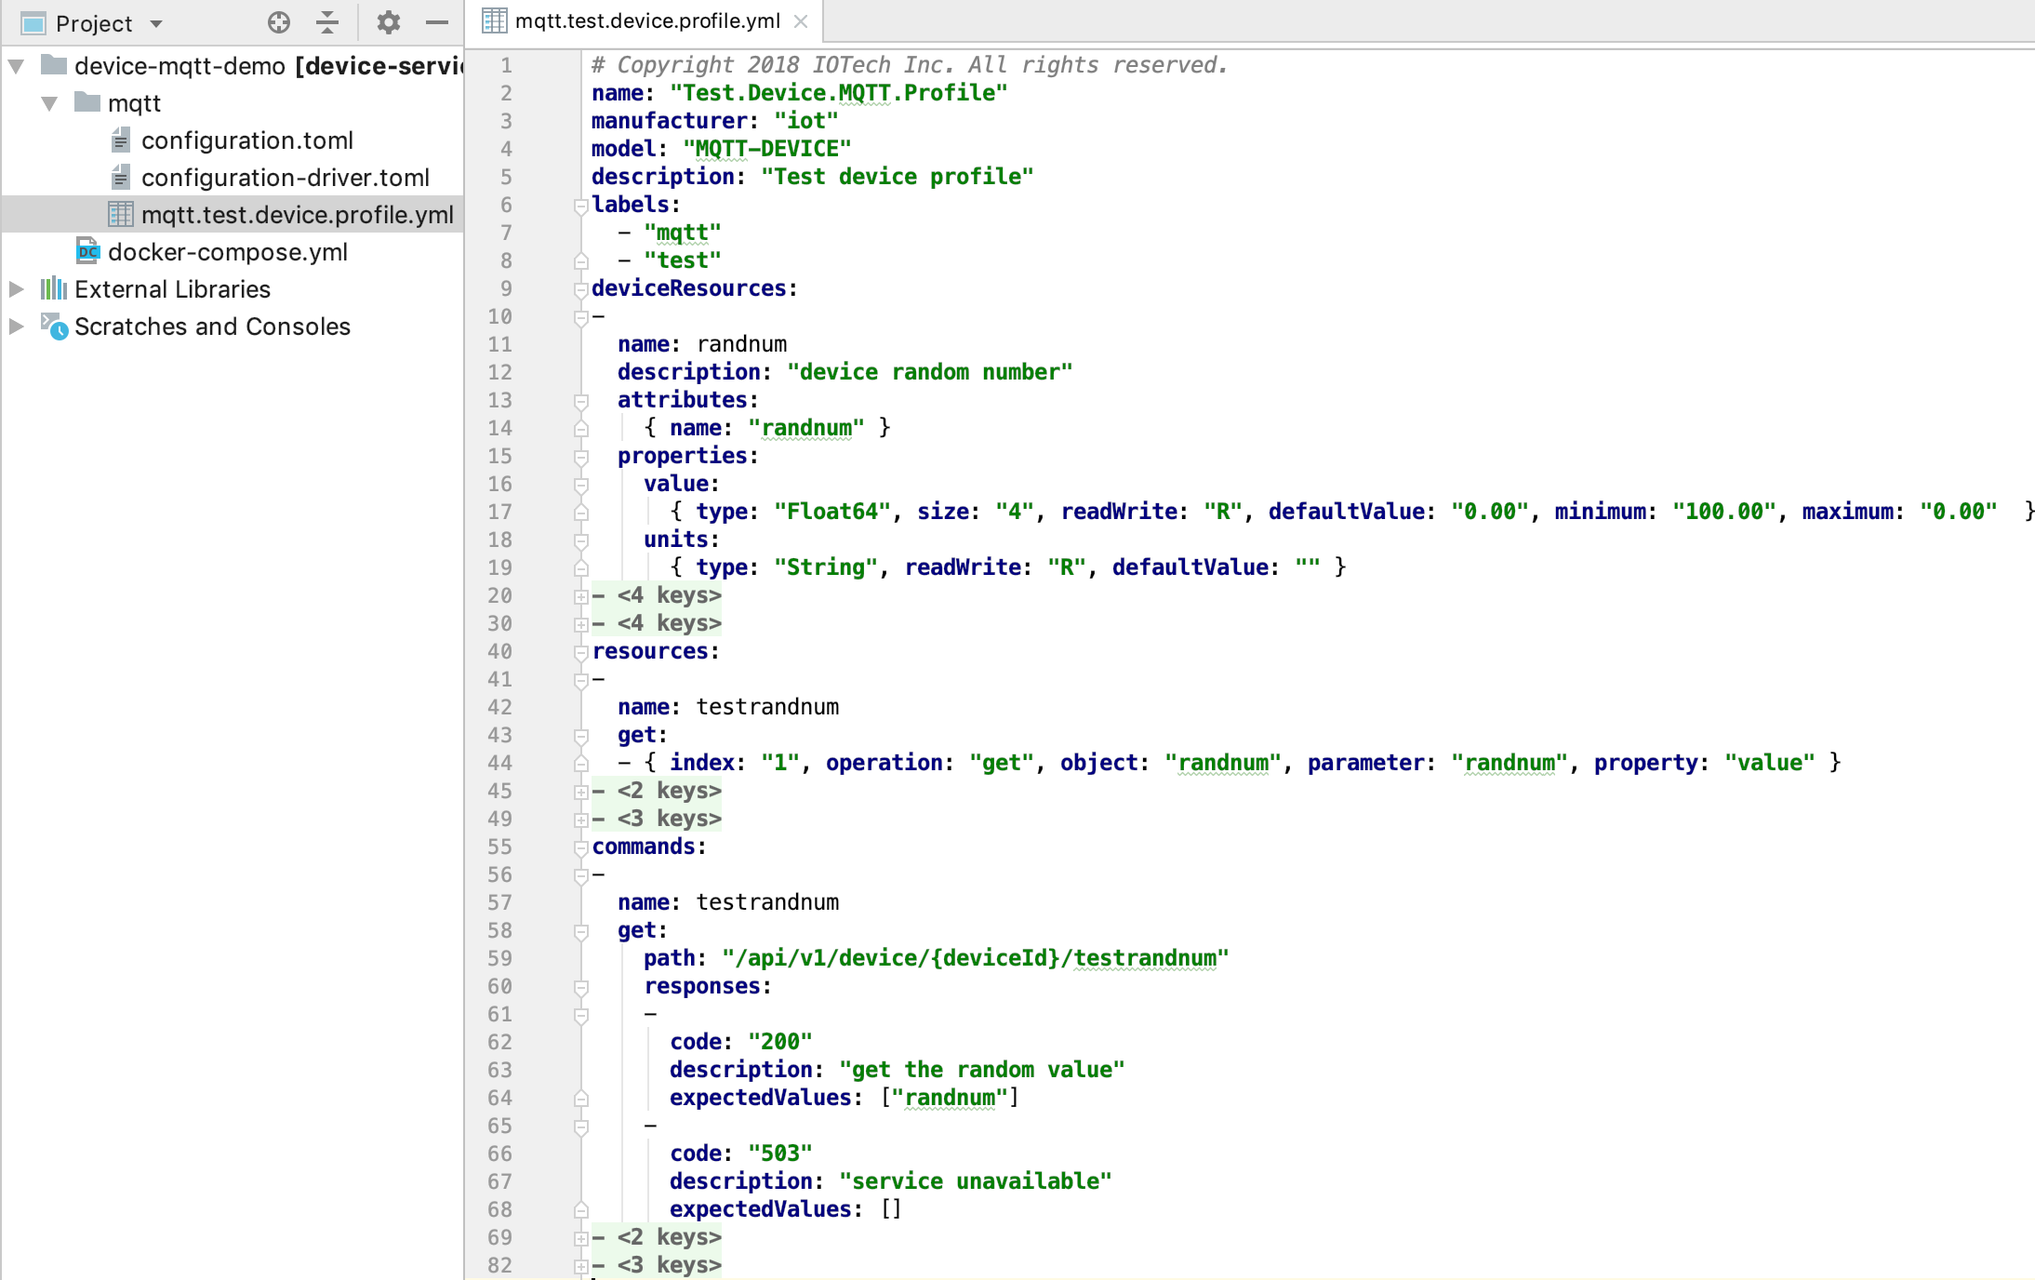
You can download and use the provided mqtt.test.device.profile.yml.
6.4.4.2. Set Up Device Service Configuration
Use this configuration file to define devices and schedule jobs. The device-mqtt generates a relative instance on startup.
MQTT is subscribe/publish pattern, so we must define the MQTT connection information in the addressable.
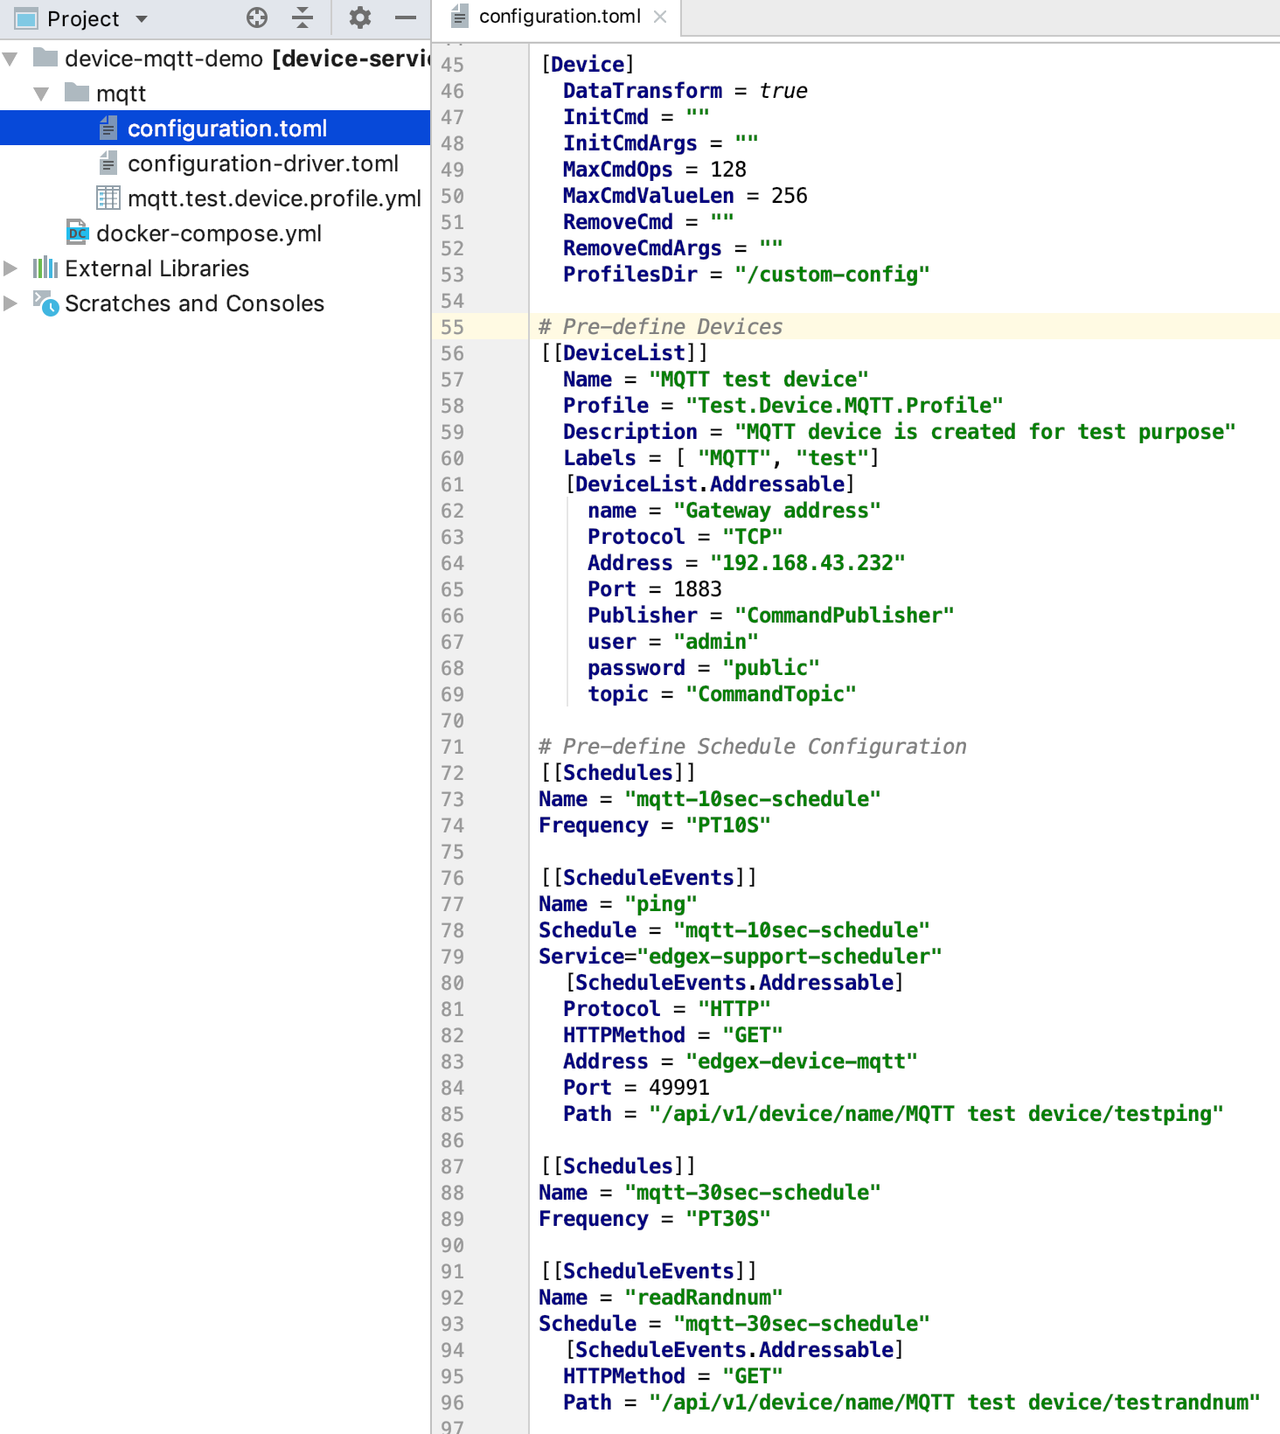
You can download and use the provided EdgeX_ExampleMQTT_configuration.toml.
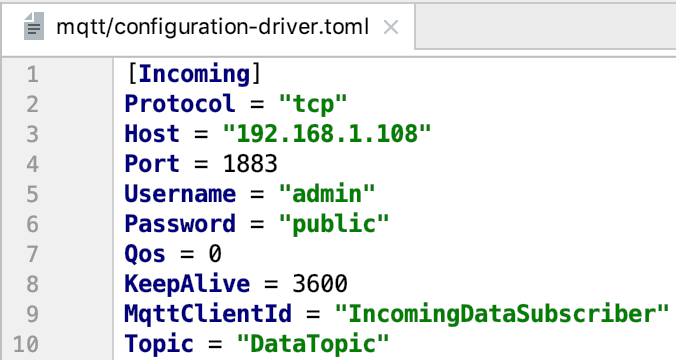
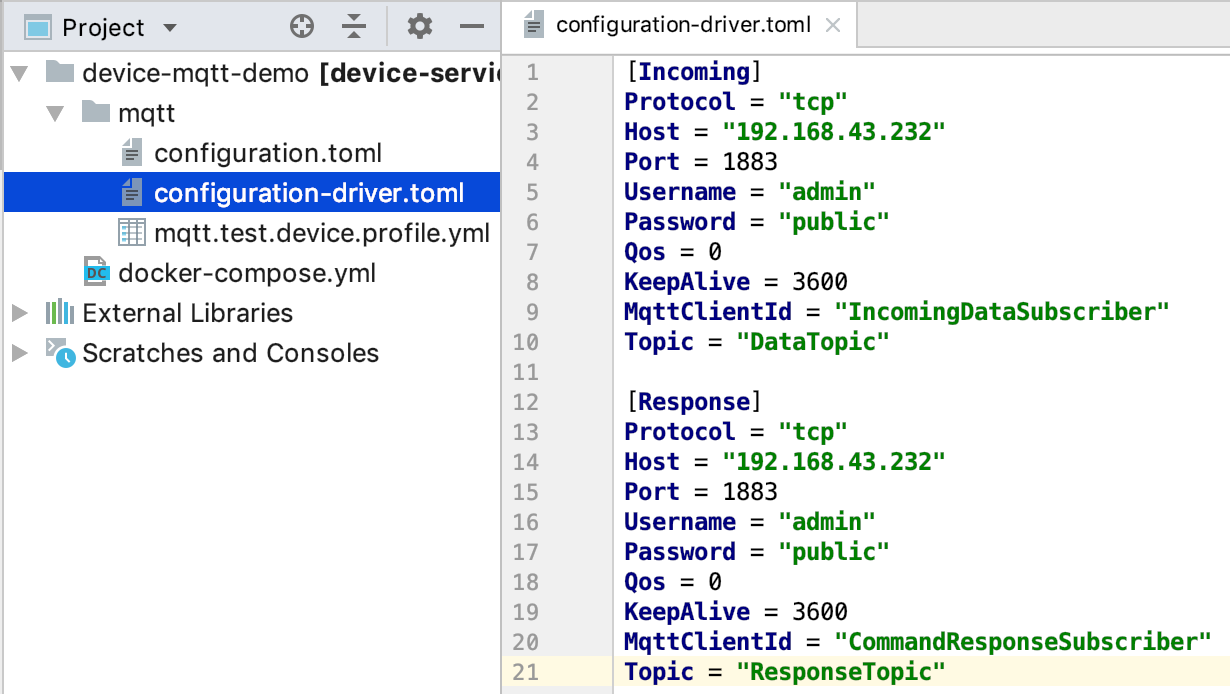
6.4.4.3. MQTT Driver Configuration
In the MQTT driver configuration:
Incoming defines DataTopic for receive async value from device
Response defines ResponseTopic for receive command response from device
6.4.4.4. Add Device Service to docker-compose File
Because we deploy EdgeX using docker-compose, we must add the device-mqtt to the docker-compose file ( https://github.com/edgexfoundry/developer-scripts/blob/master/compose-files/docker-compose-delhi-0.7.0.yml ). If you have prepared configuration files, you can mount them using volumes and change the entrypoint for device-mqtt internal use.
device-mqtt
  image: docker.edgexfoundry.org/device-mqtt-go-x86_64:test ports:
    - "49982:49982"
  container_name: edgex-device-mqtt
  hostname: edgex-device-mqtt
  networks:
    edgex-network:
      aliases:
      - edgex-device-mqtt
  priviledged: true
  volumes:
    - db-data:/data/db
    - log-data:/edgex/logs
    - consul-config:/consul/data
    - /device-service-demo/mqtt:/custom-config
  depends_on:
    - data
    - command
  entrypoint:
    - /device-mqtt
    - --registry
    - --confdir=/custom-config

networks:
  edgex-network:
    driver: "bridge"
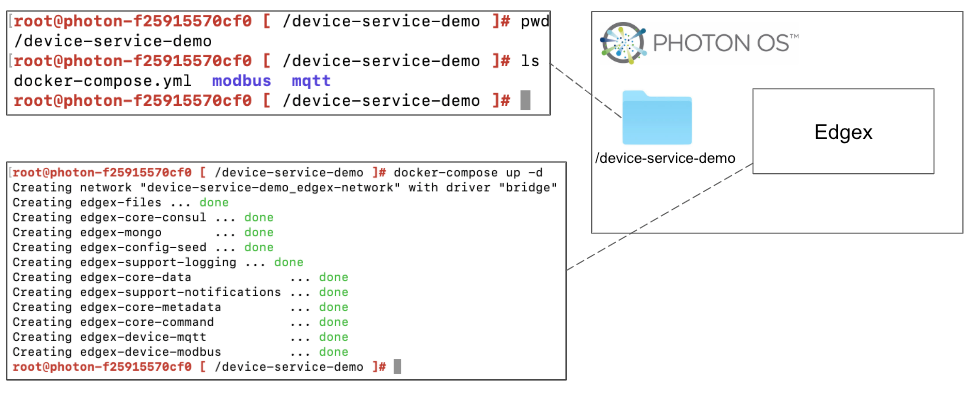
6.4.5. Start EdgeX Foundry on Docker
Finally, we can deploy EdgeX in the Photon OS.
Prepare configuration files by moving the files to the Photon OS
Deploy EdgeX using the following commands:
docker-compose pull
docker-compose up -d
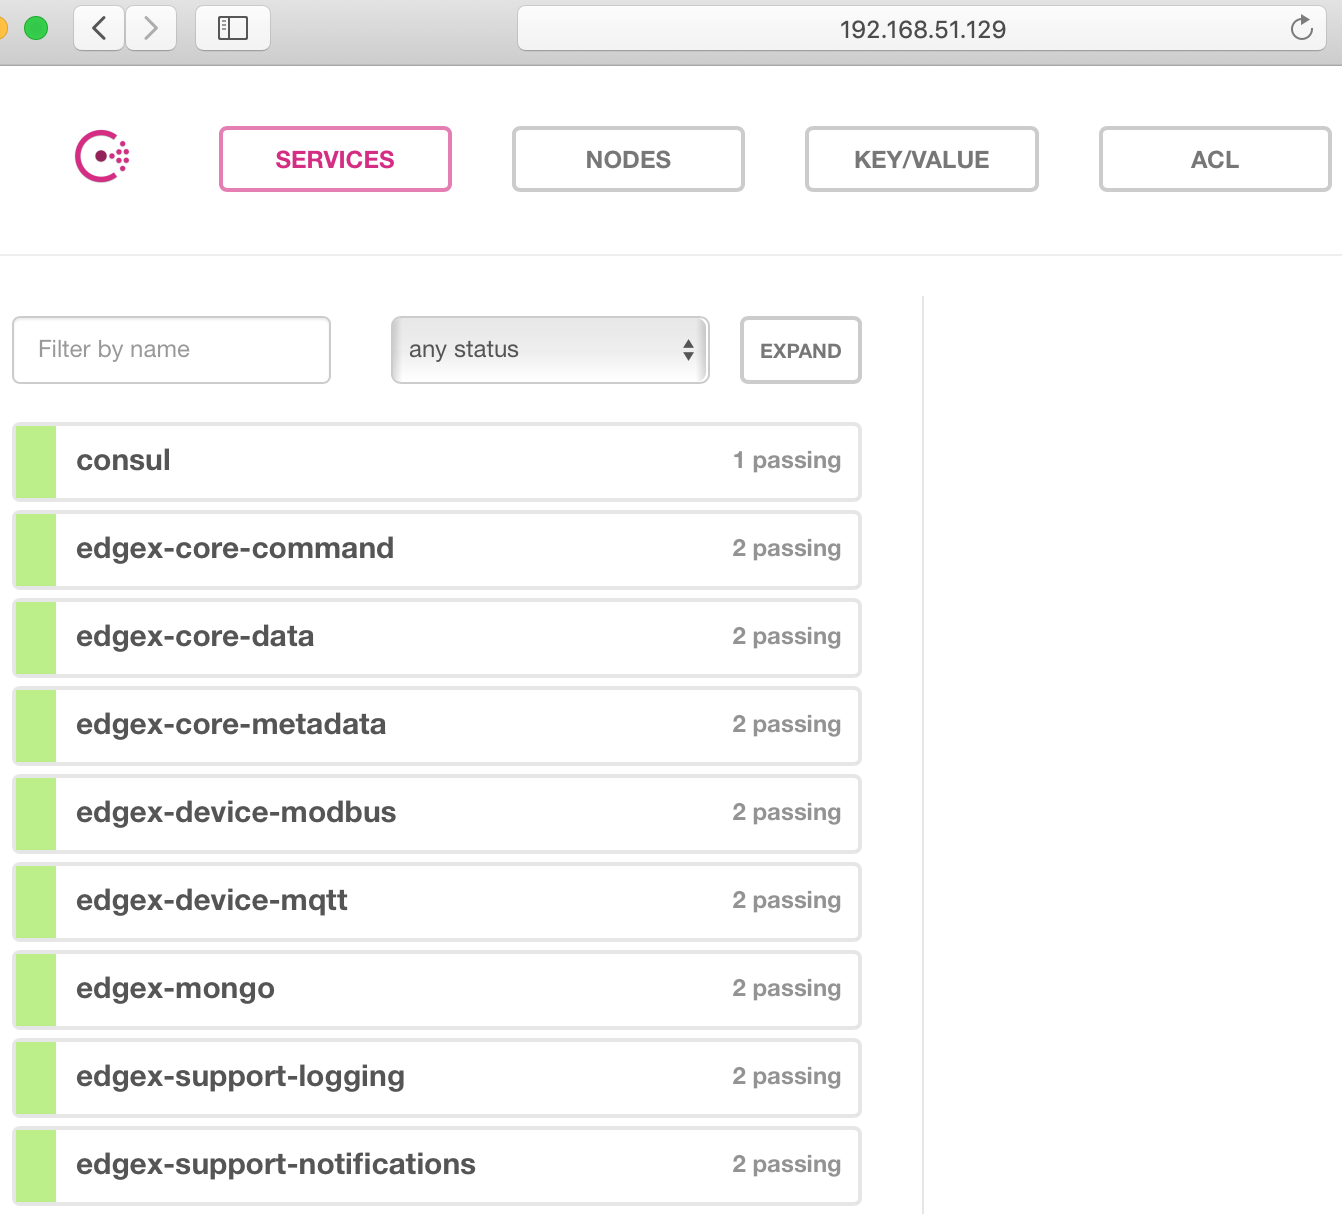
Check the consul dashboard
6.4.6. Execute Commands
Now we’re ready to run some commands.
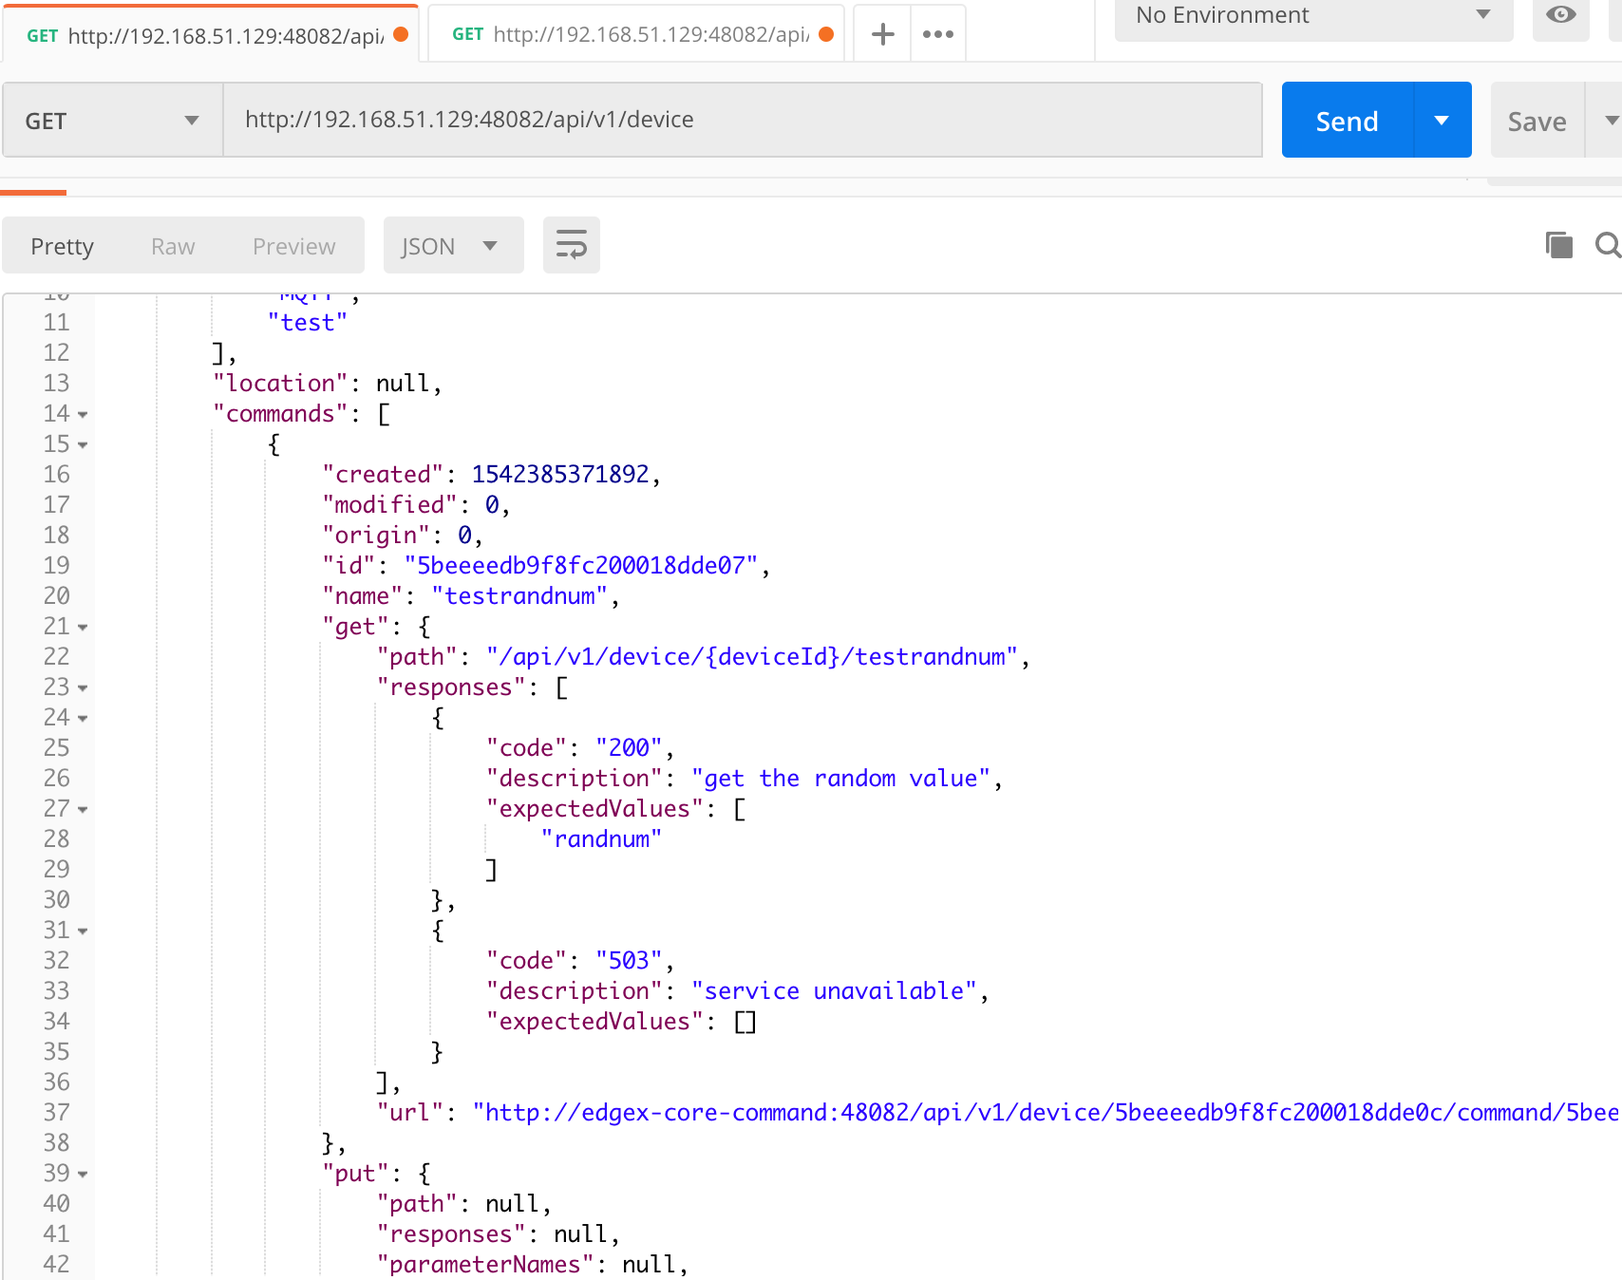
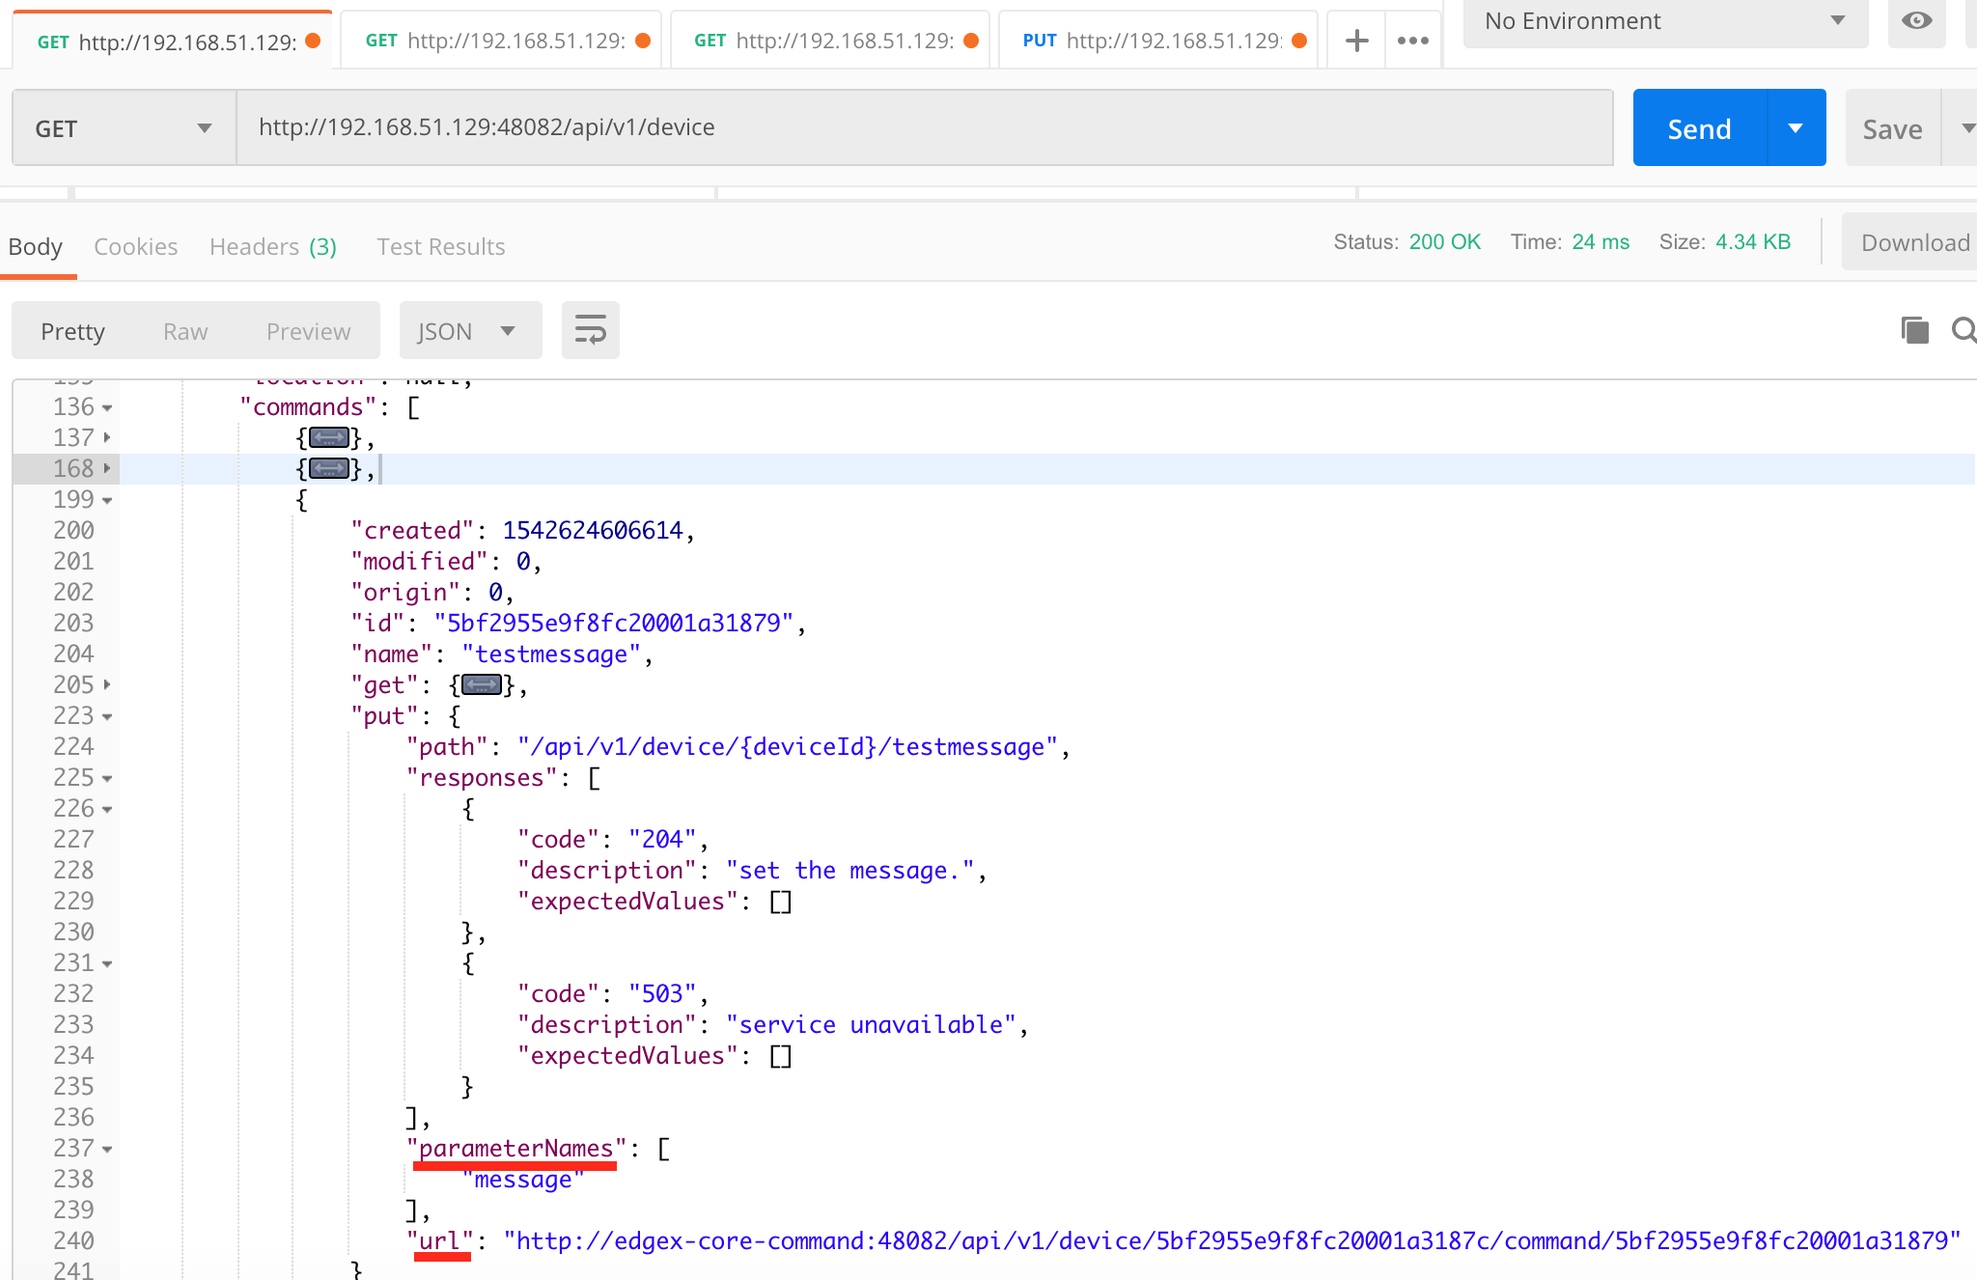
6.4.6.1. Find Executable Commands
Use the following query to find executable commands:
<server-ip>:48082/api/v1/device
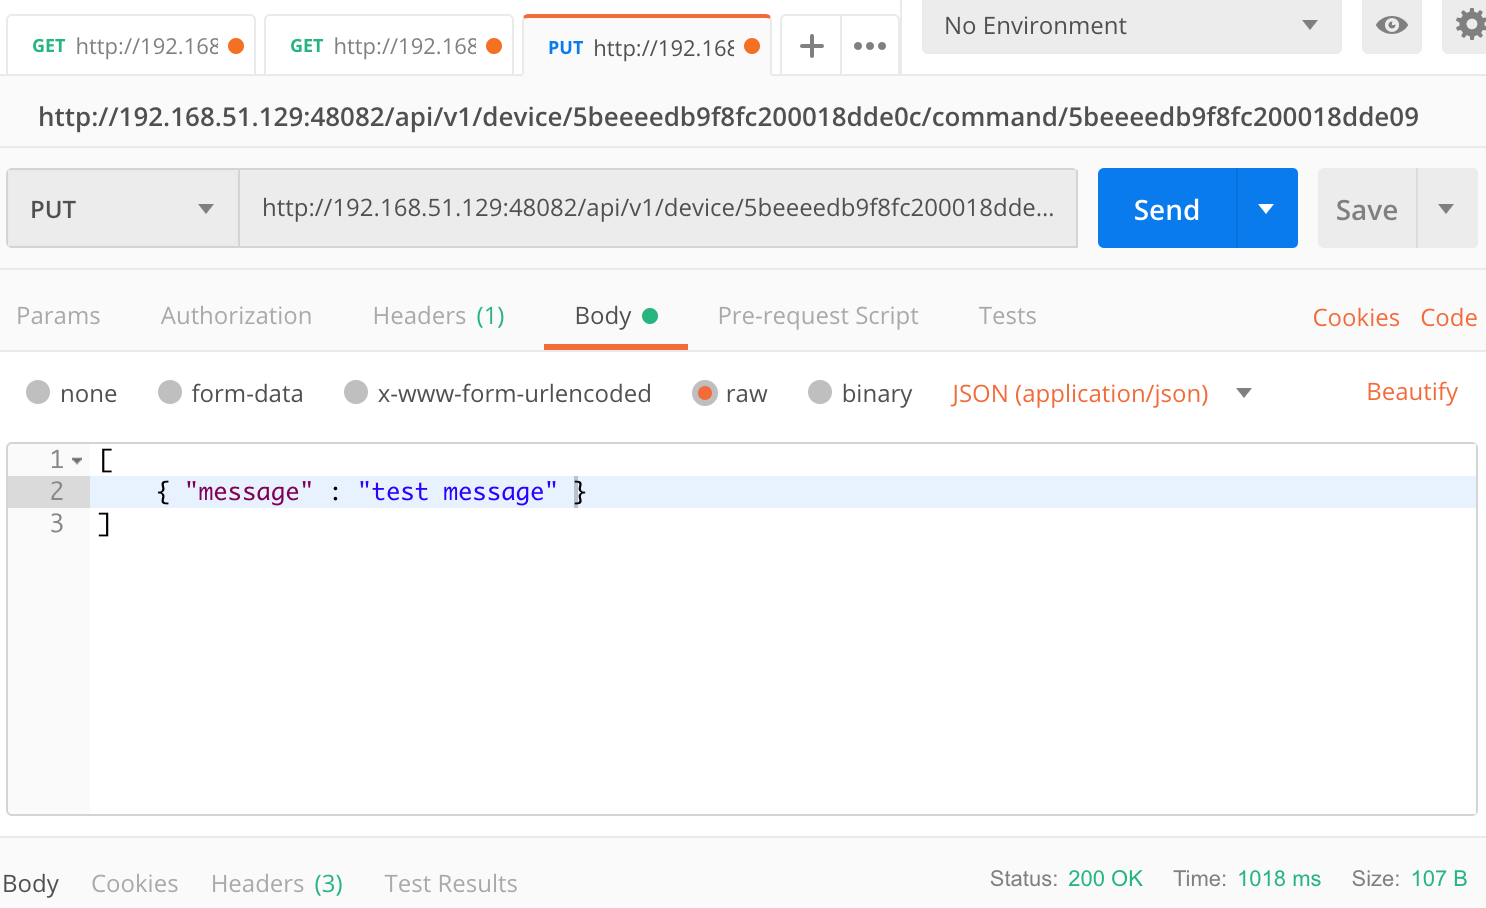
6.4.6.2. Execute GET command
Replace <host> with the server IP when running the edgex-core-command.
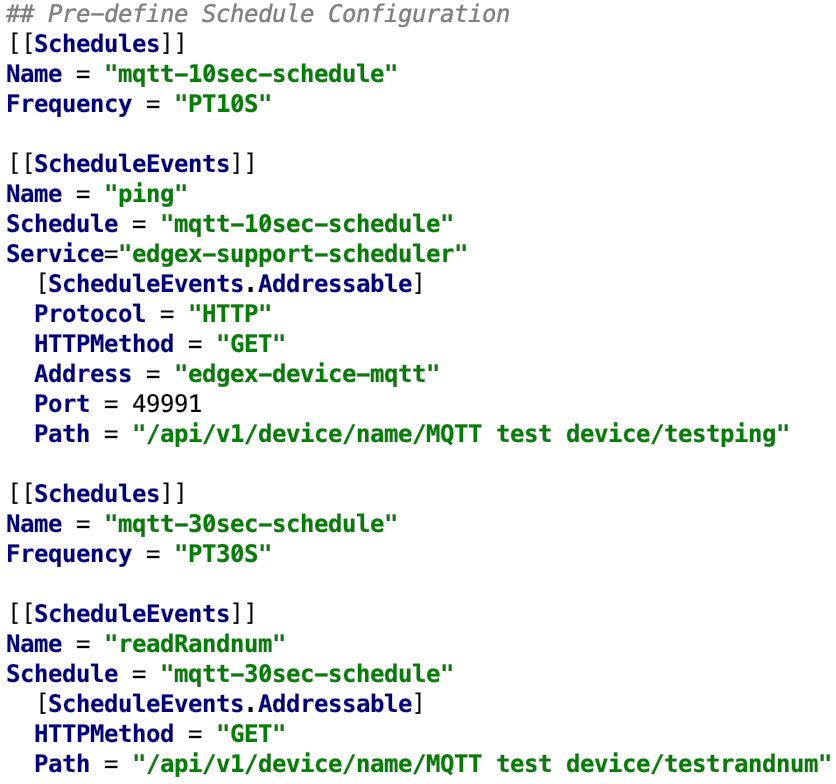
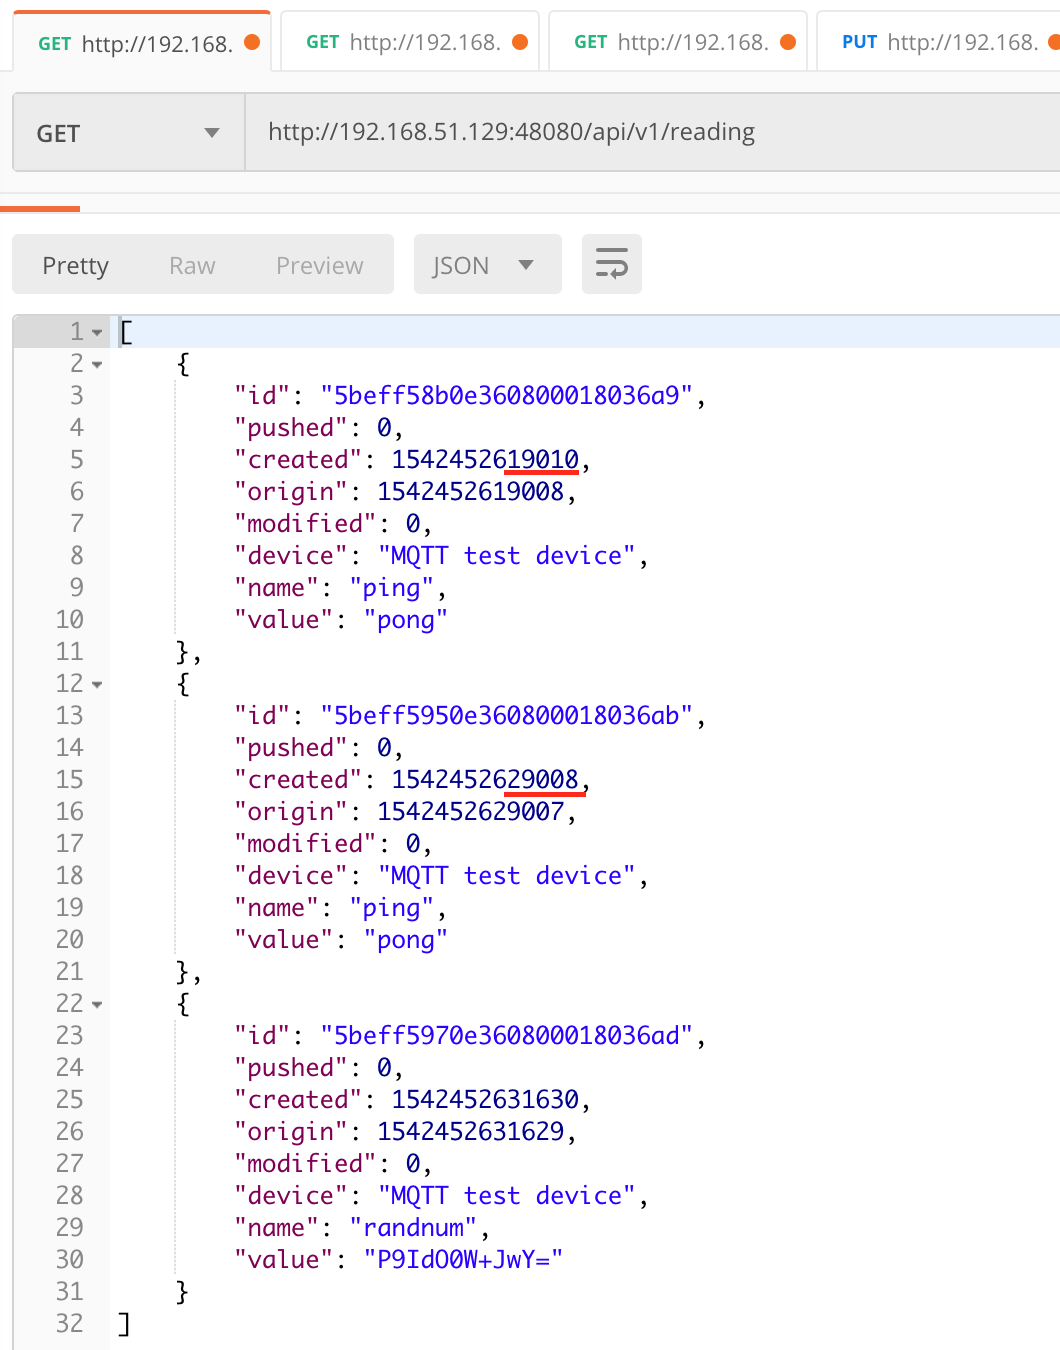
6.4.7. Schedule Job
After service startup, query core-data’s reading API. The results show that the service auto-executes the ping command every 10 seconds and the readRandnum command every 30 seconds.
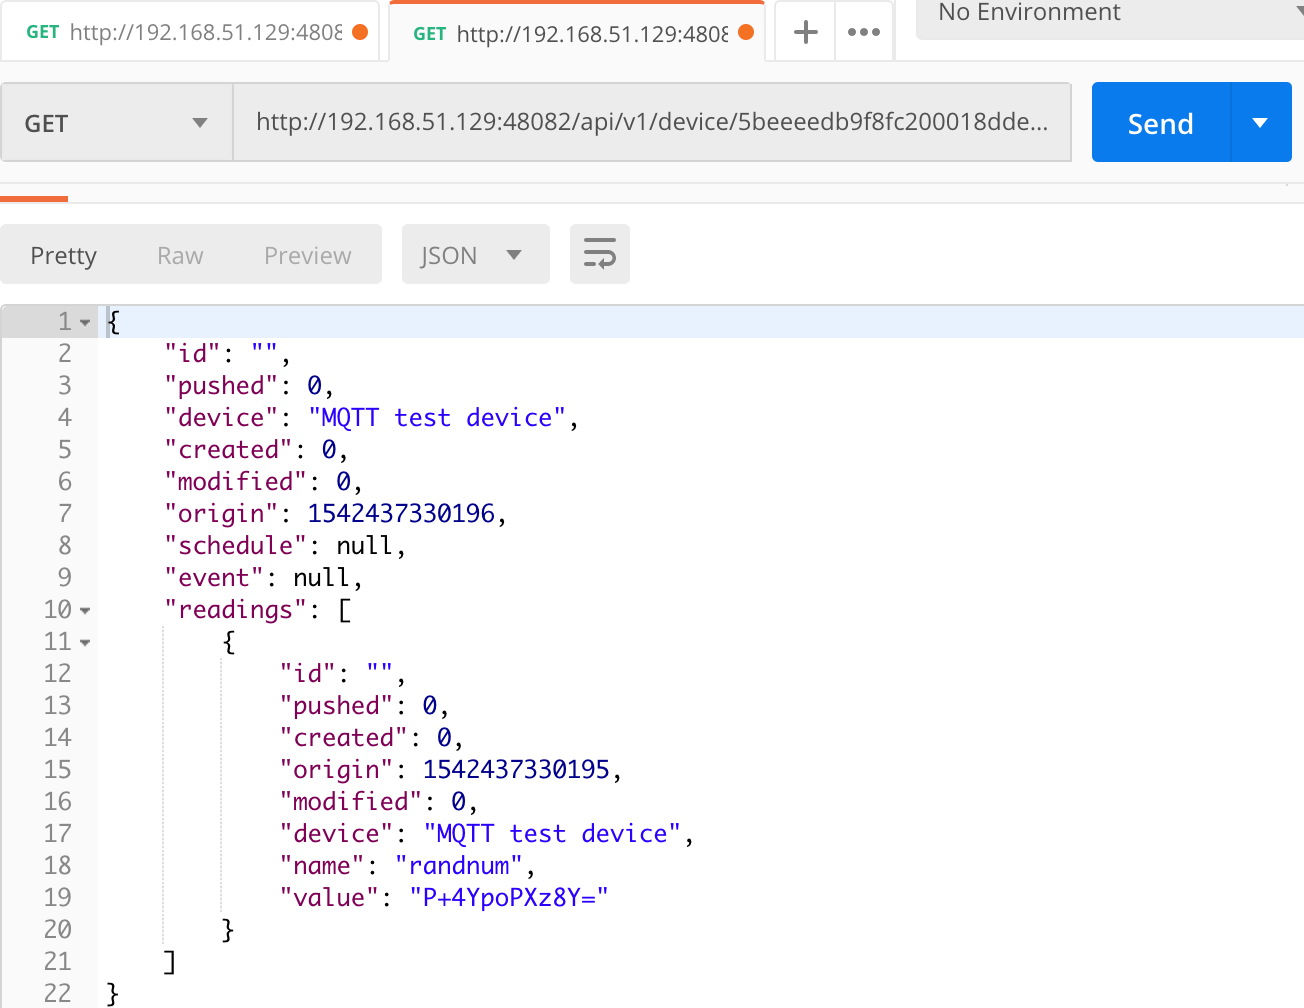
6.4.8. Async Device Reading
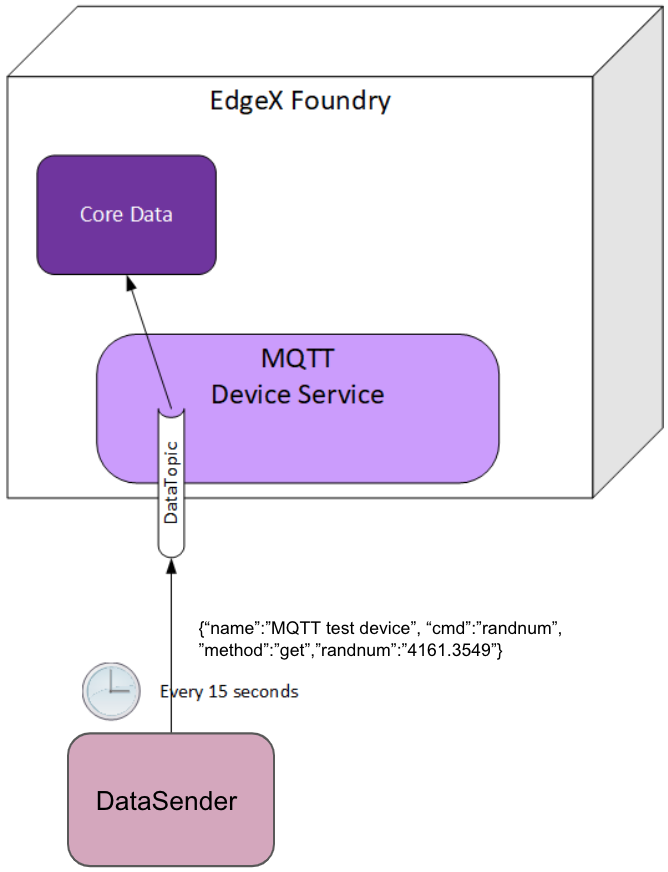
device-mqtt subscribes to a DataTopic, which is wait for real *device to send value to broker, then device-mqtt parses the value and sends it back to core-data.
The data format contains the following values:
- name = device name
- cmd = deviceResource name
- method = get or put
- cmd = device reading
You must define this connection information in the driver configuration file.